This blog will walk you through the creation and deployment of a JavaScript Functions application using the Azure Functions extension in Visual Studio Code.
Prerequisites:
- Download Visual Studio Code
- Install Node.js and npm
Note: To enable local debugging, you need to install the Azure Functions Core Tools. Operating Systems:
- For macOS, install using Homebrew.
$ brew tap azure/functions$ brew install azure-functions-core-tools- For Windows, install using npm.
$ npm install -g azure-functions-core-tools@core
Once you have the prerequisites we can proceed by Installing the Azure Function Extension
Install the Azure Functions extension
Once the extension is installed, log into your Azure account - in the AZURE FUNCTIONS explorer, click Sign in to Azure... and follow the instructions.

Once logged in we should see our Azure email address in the status bar and the subscriptions in the AZURE FUNCTIONS explorer.
Verify that you have the Azure Functions tools installed by opening a terminal and running $ func
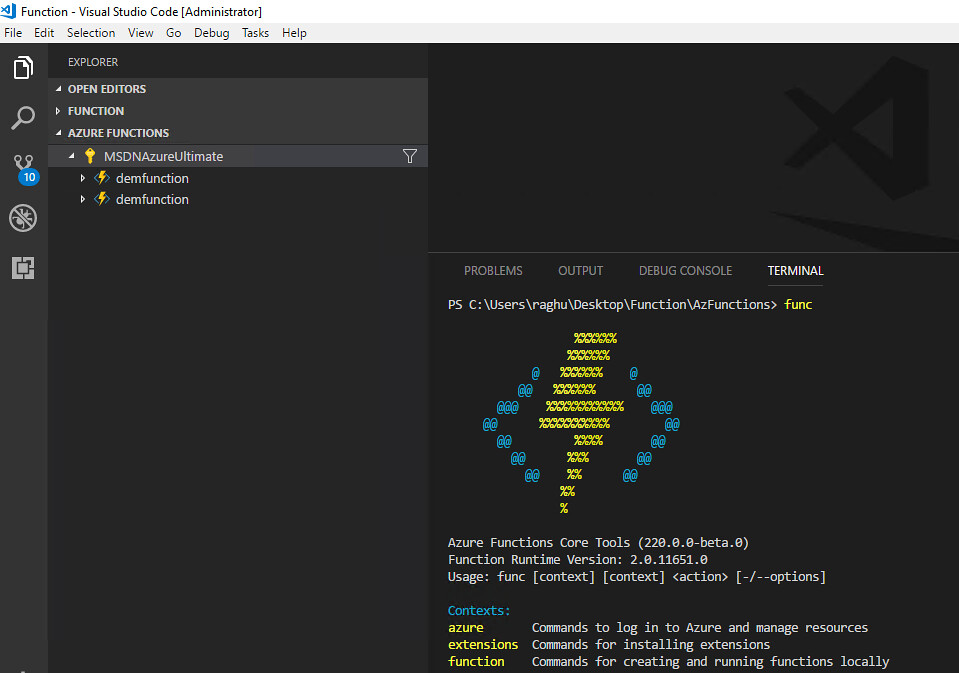
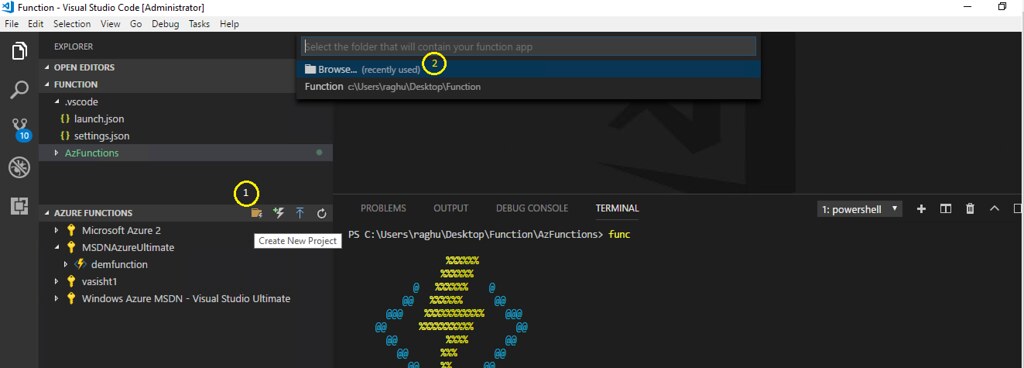
Once we have all set up we can quickly create a Function App
Follow the below image and choose an empty directory for the app and then select JavaScript for the language of your Functions App.

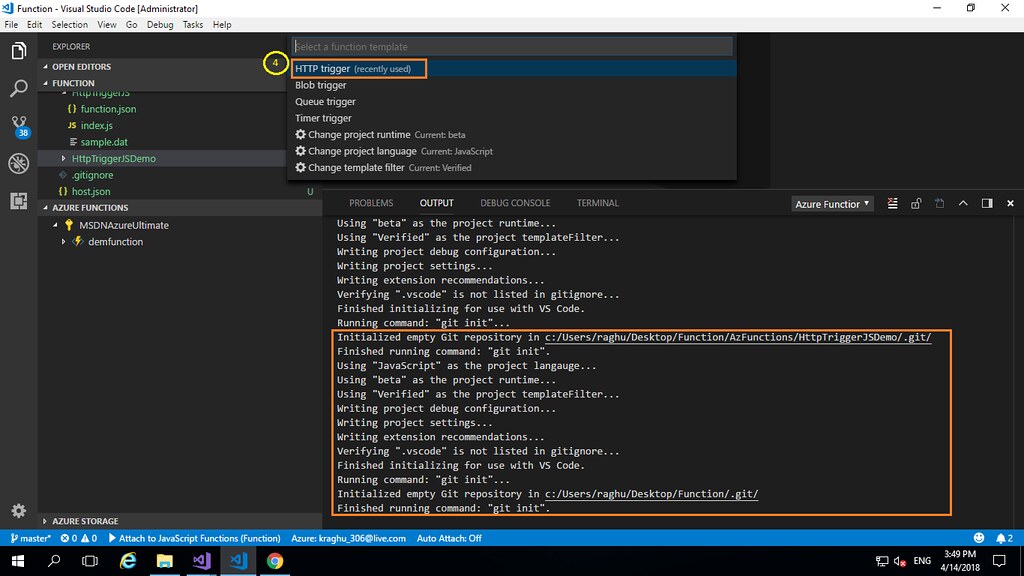
Next, Choose a HTTP trigger Function for your function app and choose Anonymous authentication.
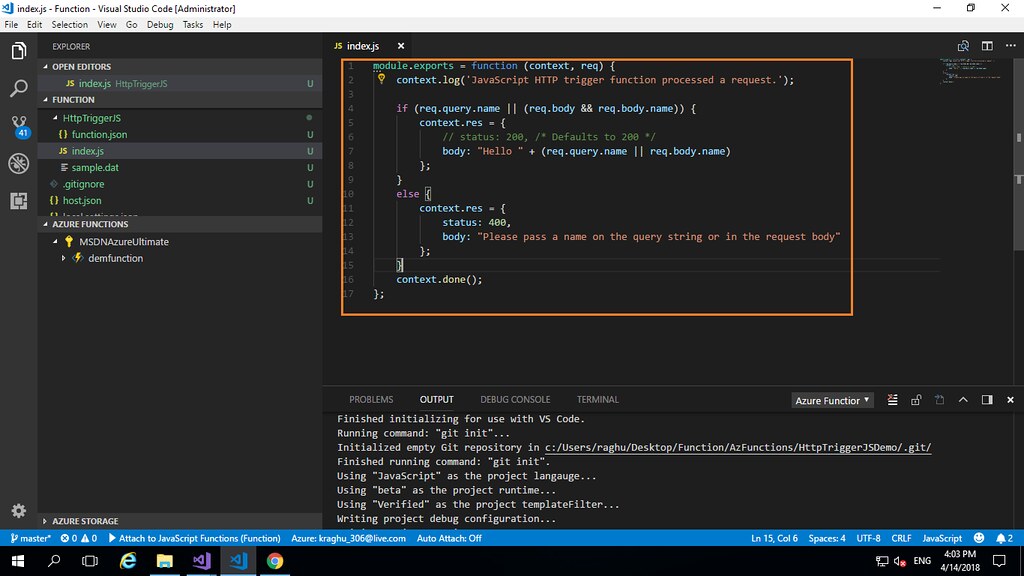
Function app includes index.js and functions.json files. The index.js file contains the source code that responds to the HTTP request and functions.json contain the binding configuration for the HTTP trigger.
Once done, let's run the function app locally by pressing F5 which will launch the app locally and attach to the Azure Functions host(which is the same runtime that runs on Azure).
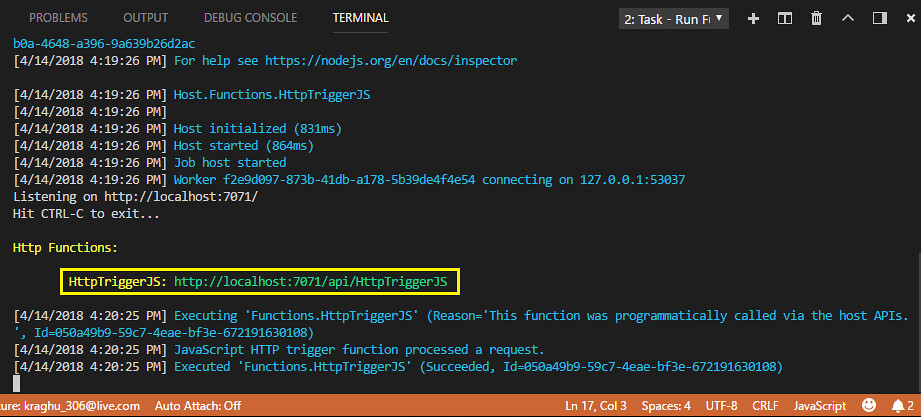
Now we can navigate to http://localhost:7071/api/HttpTriggerJS and pass the query parameter for the response, add ?name=<yourname> to the localhost URL in the browser to see the response.
NOTE: You can also set a breakpoint(by pressing F9) when running locally to test any changes just as we do in Visual Studio.

To deploy we can deploy from the Command Palette (Ctrl+Shift+P) by typing 'deploy to function app' and running the Azure Functions: Deploy to Function App command or use the Azure Function extension:

Follow the prompts in VS Code and Choose the directory of Function App, select your target Azure subscription, and then choose to Create New Function App or select an existing Function App, but if selected to create a new function app you might have to provide more details like below:
Typing a unique name for the Function App.
Choose Create New Resource Group, type a resource group name, like myResourceGroup and press Enter.
Choose a location in a region near you or near other services you may need to access.
Choose to Create New Storage Account, type unique name for creating new storage account which will be used by the function app.
Note: Storage account names must be less than 24 characters in length and should contain lower case and valid characters.
VS Code will create the Function app along with storage account.
We can check the Output panel which displays all the Azure resources that were created in the subscription.
Once deployed successfully we can navigate to the Function App endpoint and pass the query parameter for the response, add ?name=<yourname> to the Function Endpoint URL in the browser to see the response.
Finally, we've successfully completed the creation and deployment of Function App using VS Code..!
Few resources on Function Apps:
- Create a function that runs on a schedule
- Create a function triggered by Storage queue messages
- Create a function triggered by a generic webhook
- Create a function triggered by a GitHub webhook
- Add messages to an Azure Storage queue using Functions
- Store unstructured data in Azure Cosmos DB using Functions
Thanks for Reading..!! Do follow my blog for more stuff on Azure.